 how-to
Emergency Fix for Leaking Pipe: Step-by-Step Guide
Table of Contents
- Identifying the Source of the Leak
- Locating Your Water Shut Off Valve Location
- Turning Off the Water Supply
- Best Pipe Repair Tape for Water Leaks
- Using Pipe Repair Clamps for Quick Fixes
- Reducing Water Pressure and Preventing Further Damage
- Emergency Plumber Call Out Costs and When to Call
- Post-Repair Monitoring and Water Damage Prevention
- Frequently Asked Questions
Last Updated: September 28, 2026
Identifying the Source of the Leak
The first step in an emergency fix for leaking pipe situations is pinpointing exactly where the water is escaping. Pinhole leaks or slow drips hidden behind walls or under floorboards can be tricky to spot.
Look for these tell-tale signs:
- Water stains on ceilings, walls, or floors
- Damp patches that grow over time
- Hissing or dripping sounds in walls or under floors
- A sudden spike in your water bill
- Soft, spongy flooring or drywall
Once you've found the general area, trace the leak to its exact source. The water you see may have travelled several metres from where the pipe actually burst, follow the dampness back to its origin.
Check pipe fittings and joints carefully, these weak points often fail first due to corrosion, age, or pressure surges.
Locating Your Water Shut Off Valve Location
Before you attempt any emergency fix for leaking pipe work, you must know where your stopcock is. This isolation valve controls your entire water supply.
Your stopcock is typically located:
- Under the kitchen sink (most common)
- In a cupboard near the front door
- In the garage or utility room
- Under the stairs
- Outside in a small green or grey box in your garden (the external stopcock)
The main water shut off valve is usually a small tap or lever. Turn it clockwise to close it. You should hear the water pressure drop immediately.
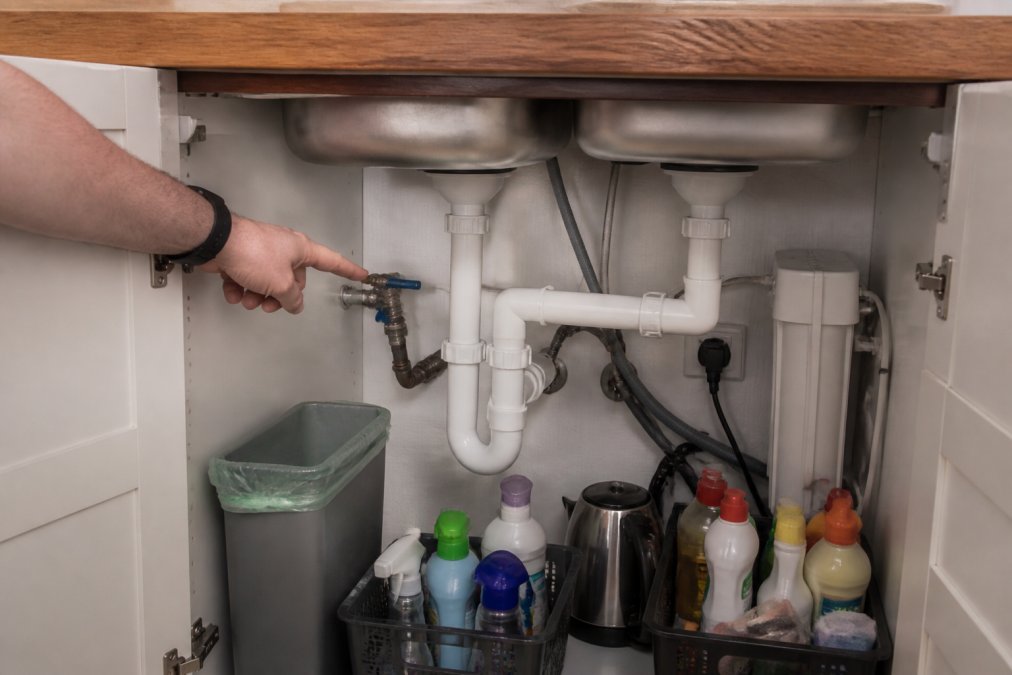
If you cannot find your stopcock, check your home's water supply documentation or contact your water supplier. Some older properties have stopcocks buried outside; knowing this in advance saves crucial minutes during an emergency.
Test your stopcock now, before you need it. If it won't budge, apply penetrating oil and wait 30 minutes before trying again.
Turning Off the Water Supply
Once you've located your stopcock, turn it clockwise slowly and steadily until it stops. The water pressure in your pipes should drop within seconds.
After closing the stopcock, open a tap upstairs and a downstairs tap to drain the system fully. If water still drips from the burst pipe, wait a few more seconds for the system to depressurise completely.
Best Pipe Repair Tape for Water Leaks
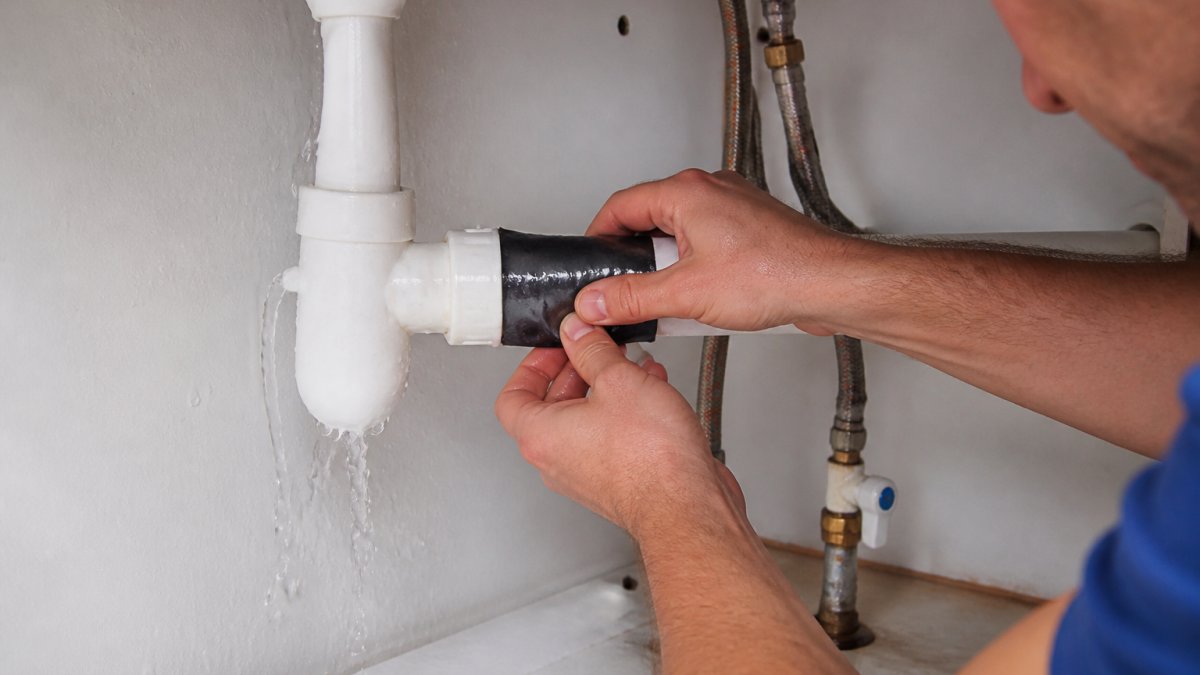
Self-amalgamating tape is the fastest temporary solution for an emergency fix for leaking pipe work. This specialist tape bonds to itself, creating a waterproof seal without needing adhesive, though effectiveness depends on your pipe material.
Material-Specific Tape Application
Copper pipes are the most forgiving. Dry the pipe thoroughly, then apply tape with 50 per cent overlap. Allow at least 2 hours before running hot water.
PVC plastic pipes require extra care. Roughen the pipe lightly with fine sandpaper (120-150 grit) before taping to help the tape grip. Wrap with deliberate tension, stretching the tape as you go. Avoid hot water for at least 4 hours after application.
PEX (cross-linked polyethylene) pipes require 60 per cent overlap due to flexibility under water pressure. Reinforce with a pipe repair clamp if the leak is on a horizontal run.
Compression fittings and joints are weak points on all materials. For leaks at fittings, apply epoxy putty first to seal the joint, then wrap tape around the entire fitting area for reinforcement.
The tape works on wet pipes and stretches as you wrap it, creating pressure that forces it into cracks and gaps. Epoxy putty offers a more permanent solution, hardening into a solid compound that can last months or years. Both work best on small leaks; for large cracks or burst sections, use a pipe repair clamp or professional help.
How to Apply Self-Amalgamating Tape
Self-amalgamating tape requires no primer or adhesive. Start by drying the pipe as much as possible with a cloth or paper towel. For PVC, use fine sandpaper to lightly abrade the surface to improve adhesion.
Stretch the tape as you wrap it around the pipe, overlapping each layer by 50 per cent (60 per cent for PEX). Wrap at least 5 centimetres beyond the leak in both directions. For joints, extend the tape 3 centimetres up each pipe entering the fitting.
The tape reaches full strength after 24 hours. Do not run hot water through the pipe for at least 2 hours after application (4 hours for PVC). Reduce water pressure to 1.5 bar temporarily if you have a pressure regulator.
Using Epoxy Putty for Permanent Sealing
Epoxy putty is a two-part compound that hardens into a waterproof seal on metal, plastic, and ceramic pipes. Knead the putty in your hands until it reaches a uniform colour (about one minute). On copper, the putty sets faster due to heat transfer; on PVC and PEX, it sets more slowly.
Dry the pipe thoroughly. For copper and metal pipes, use a cloth or fine sandpaper to remove loose material or corrosion. For PVC and PEX, light sanding (120-150 grit) helps the putty grip.
Press the putty firmly into and around the leak, extending at least 2 centimetres beyond the damaged area. On joints, work the putty into the gap between the fitting and pipe. Allow the putty to cure for the time specified on the package, usually 24 hours. Do not use the pipe until the putty has fully hardened.
Using Pipe Repair Clamps for Quick Fixes
A pipe repair clamp is a metal band with a rubber gasket that clamps around a burst or leaking pipe. Clamps work on any pipe material, handle high water pressure, are reusable, and take less than five minutes to install.
Position the clamp so the rubber gasket sits directly over the leak.
Reducing Water Pressure and Preventing Further Damage
High water pressure strains your plumbing system and makes leaks worse. Reducing pressure prevents additional damage while you work on repairs.
Reducing System Pressure
If your pressure is above 3 bar, reduce it using your pressure regulator (usually located near your stopcock). Lower the pressure to 2 bar for normal use, or to 1.5 bar for the first 24 hours after applying temporary repairs. You can also reduce pressure temporarily by opening a tap slightly.
Immediate Water Damage Mitigation
While the leak is active, water spreads rapidly through walls, under flooring, and into structural materials. The first 30 minutes are critical for preventing long-term damage.
Emergency Plumber Call Out Costs and When to Call
Temporary fixes buy you time, but they are not permanent solutions. Call a professional plumber immediately if the leak is large or actively spraying water, the burst pipe is in a structural wall or under the floor, you cannot locate or stop the leak yourself, the temporary repair fails, or the pipe has burst completely.
Post-Repair Monitoring and Water Damage Prevention
After you've applied a temporary or permanent repair, monitor the pipe closely for the next 24 hours. Check the repair every few hours for new drips or signs that the seal is failing. Inspect the surrounding area for water damage. Dry the area thoroughly using towels, open windows and doors, and use a dehumidifier or fan if available. Keep your system pressure low while the repair cures.
Frequently Asked Questions
What is the quickest way to fix a leaking pipe?
The fastest temporary fix is self-amalgamating tape, which wraps around the leak and bonds to itself without needing additional tools. Clean and dry the affected area first, then wrap the tape tightly around the pipe, overlapping each layer by half the tape's width. For a more permanent solution that lasts longer, epoxy putty or a pipe repair clamp provides better durability. However, any temporary repair is just that, temporary. Call a professional plumber to assess the underlying cause and replace the damaged section properly.
When should you call a professional for a pipe leak?
Call immediately if the leak is from a burst pipe, a joint failure, or if water is pooling inside your property. If temporary repairs don't hold after 24 hours, or if the leak is in a hard-to-reach location like behind walls or under floorboards, professional help is essential. Temporary fixes are emergency measures only. A qualified plumber can identify whether corrosion, water pressure issues, or material defects caused the leak and prevent it from happening again.
What tools are needed for an emergency pipe repair?
For a basic emergency repair kit, you'll need self-amalgamating tape, epoxy putty, a pipe repair clamp, a wrench or adjustable spanner, and clean dry cloths. You may also need a bucket to catch water and access to your stopcock for shutting off the water supply. Ensure any sealant or bonding agent you use is WRAS approved for drinking water pipes if the leak is on the mains supply. Having these items on hand means you can act quickly while waiting for a plumber.
Is a leaking pipe always an emergency?
A small, slow pinhole leak that produces only occasional drips is less urgent than a burst pipe spraying water, but both require professional attention. Even minor leaks can lead to water damage, mould growth, and higher water bills over time. If the leak is active and water is spreading, it's an emergency, shut off the water supply and call a 24-hour plumber immediately. Slow leaks can often wait until business hours, but don't ignore them.